3 Simple Steps to Automated Trading with TradingView
This article is based on PineTrader's YouTube video showcasing exactly how to automate your TradingView strategy.
Want to see exactly how Alex does it? Watch the full video.
What you'll learn in this post:
- Step 1: Getting Your PineTrader License Key
- Step 2: Installing the MT5 Connector
- Step 3: Activating TradingView Alerts
Step 1: Get Your License Key
The first step to starting your trading automation is creating a free PineTrader account.
With your account, you'll unlock access to the payment portal and receive a free 14-day trial to test how PineTrader integrates with TradingView and PineScript strategies.
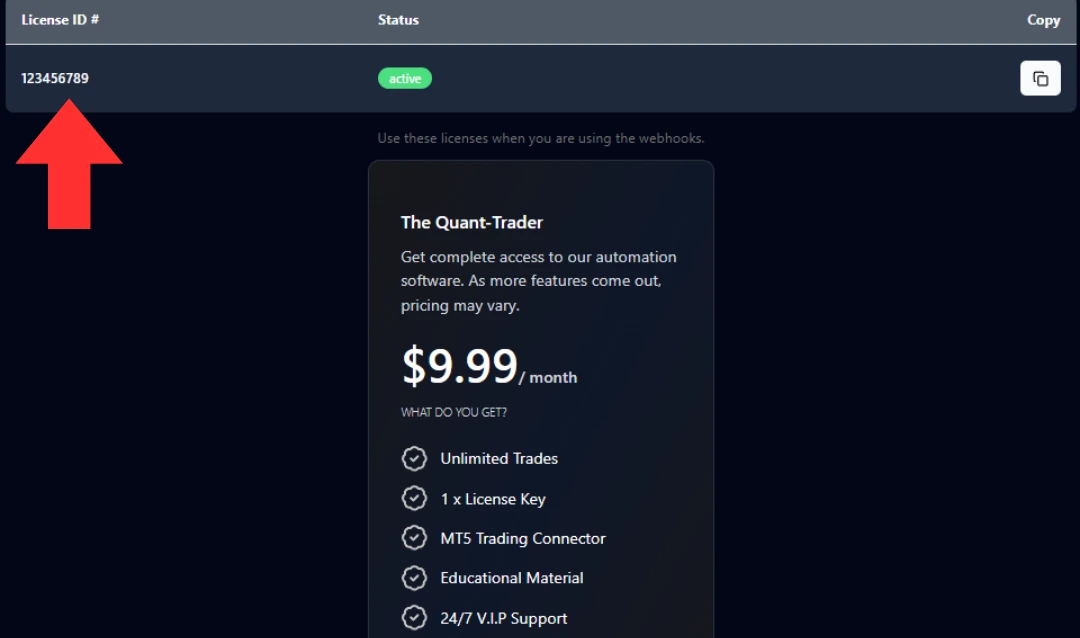
This trial allows you to get familiar with automating your trades using a trading bot. Upon starting the trial, you'll receive a unique license key—consider this like the Social Security Number of your trading setup. Keep it private! You'll need this license key to send trading orders through the system.
Step 2: Set Up MT5
Once you've got your license key, you can begin setting up your MT5 terminal to receive trades from your algorithm.
Downloading the MT5 Connector
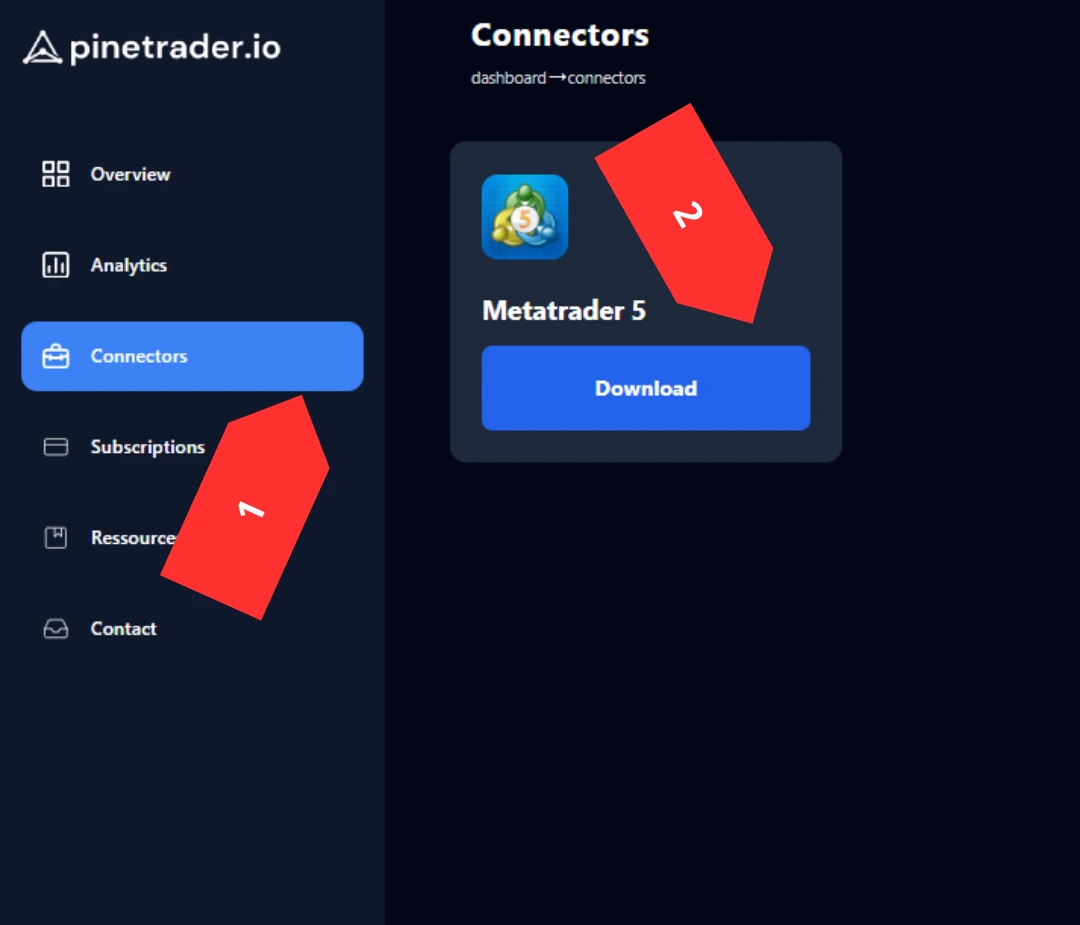
In your PineTrader account, navigate to the "Connectors" section. Here, you’ll find the MT5 connector.
To download the MetaTrader 5 connector, simply click the download button and then confirm on the pop-up. Your download should start shortly after.
Note: The connector works just like an expert advisor (EA) in MetaTrader 5, if you are familiar with the tech.
Adding the Connector to Your MT5 Terminal
To install the connector in MT5:
- Open your MT5 terminal.
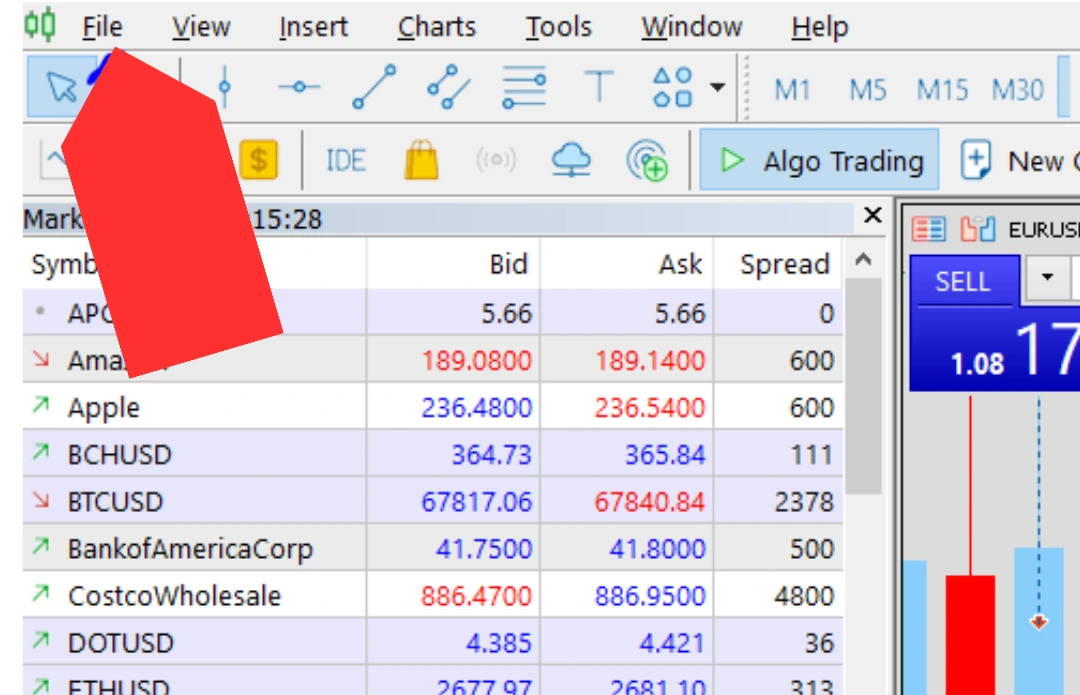
- Go to the top menu and select "File" → "Open Data Folder".
- Navigate to the "Experts" folder (MQL5 → Experts).
- Paste the downloaded connector into the "Experts" folder.
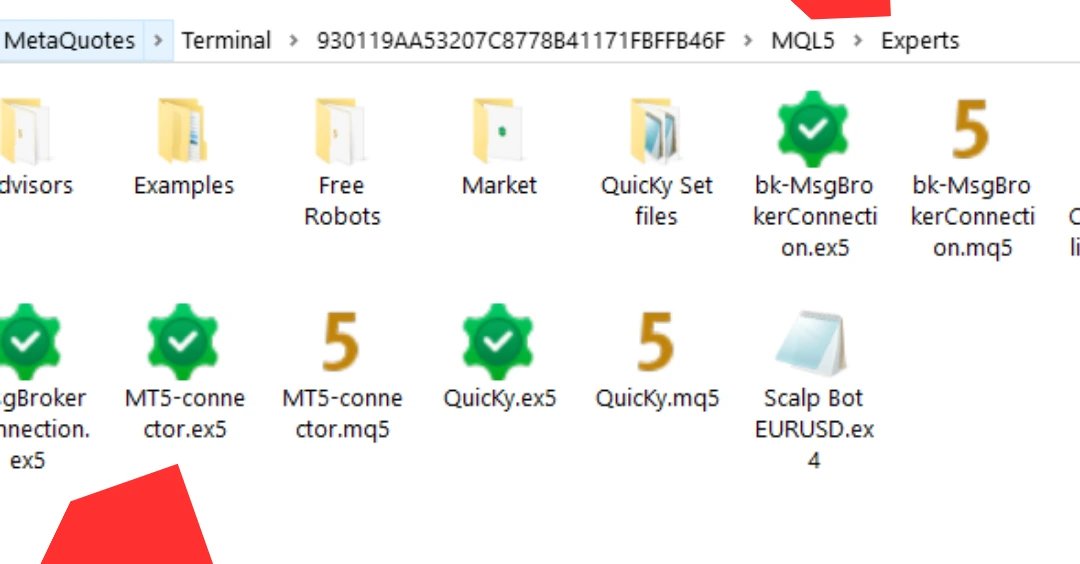
- Close the file system.
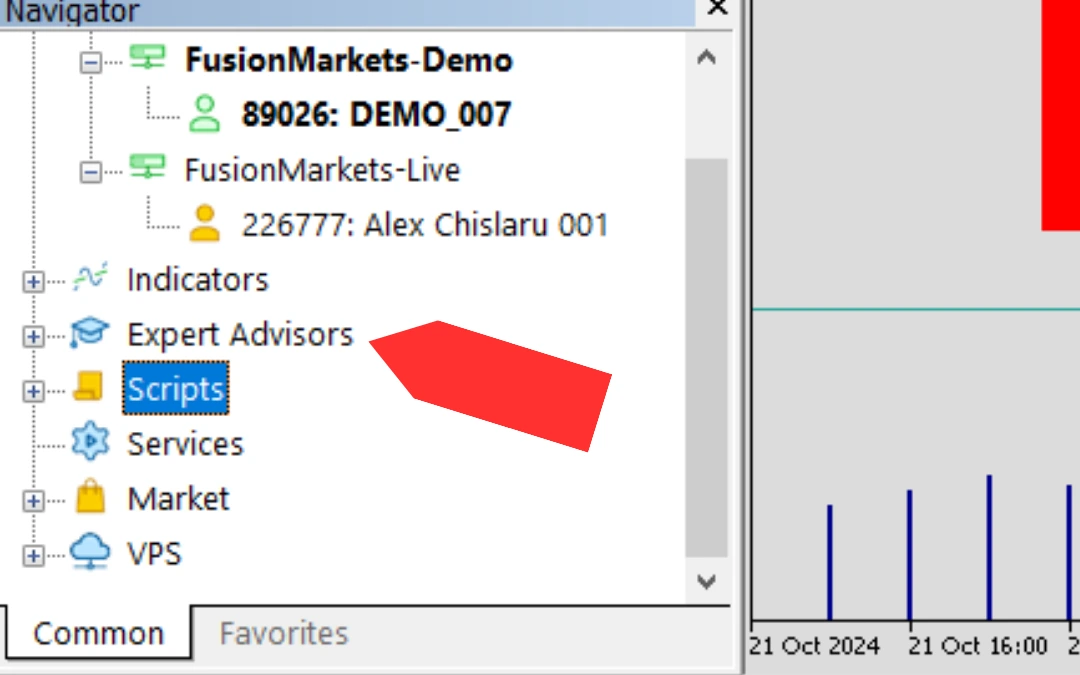
You should now see the connector in the "Navigation" panel (left sidebar). If not, right-click the "Expert Advisors" section in the Navigation panel and select "Refresh".
Allow WebRequest and Algo Trading
Before you can run the trading bot, enable certain permissions in MT5:
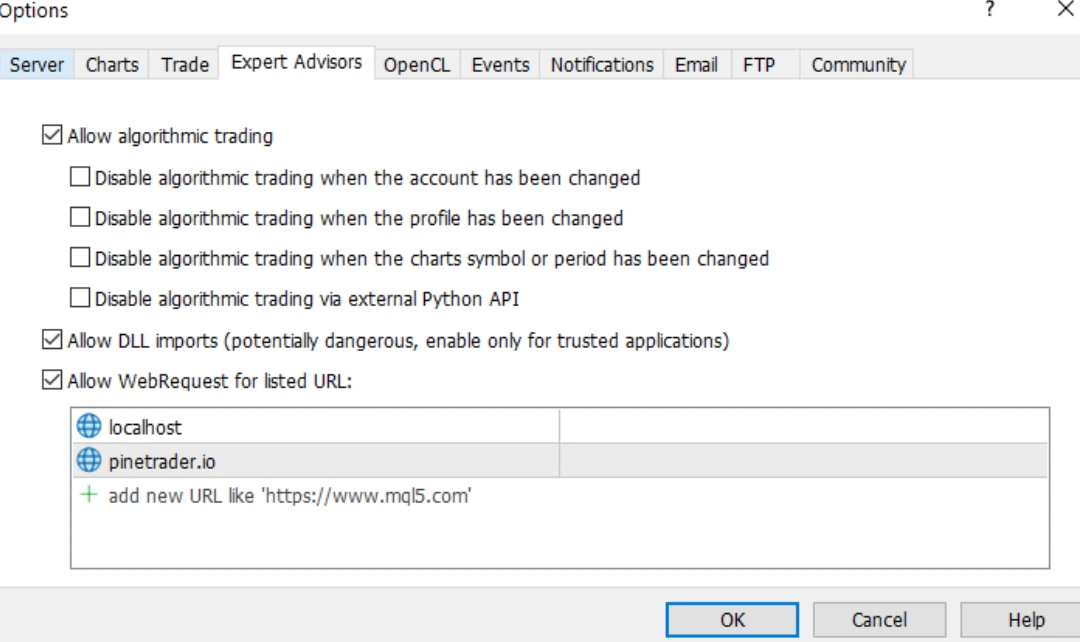
- Go to "Tools" → "Options".
- In the pop-up window, open the "Expert Advisors" tab.
- Check "Allow Algorithmic Trading" and "Allow DLL imports[...]".
- Most importantly, check "Allow WebRequest for listed URL" and add:
pinetrader.io
Click "OK" to save.
Add the Connector to Your Charts
To initialize the MT5 connector, drag and drop it onto any chart in your terminal. It loads globally, so you only need to add it once. You’ll see a menu with options like position size and trail stop settings, which are explained in more detail in the documentation.
Make sure to enter your license key in the "License ID" field. If it says "Connected successfully" in the "Experts" tab at the bottom, you’re good to go!
Step 3: Send Trades from TradingView
Finally, connect your TradingView strategy to MT5 and start sending trades automatically.
Adding the Library
To simplify the process, we provide a complete code base that generates order tickets for your alerts. You can find this in our TradingView Library.
Copy the code and paste it into a new library script on your TradingView account. After adding it to your chart, publish the library as private.
Creating the Alerts
Importing the Library
To use the library in your TradingView bot, import it with the following code:
import [USERNAME]/[LIBRARY_NAME]/[#VERSION] as [VARIABLE]
You’ll now be able to call the library using the variable name you declared after the "as" keyword. In fact you will
use it to declare three order tickets (Open long, Open Short and Close) :
Defining Order Tickets
Use the library to declare three order tickets (Open Long, Open Short, and Close):
LongTicket = [VARIABLE].CreateOrderTicket(**PARAMETER)
ShortTicket = [VARIABLE].CreateOrderTicket(**PARAMETER)
CloseTicket = [VARIABLE].CreateOrderTicket(**PARAMETER)
You'll find more about the PARAMETER in the Tradingview Documentation.
Setting Up Alert Functions
You can send alerts in many different ways. The most straight forward way is to use the built-in function :
alert(Message, frequency)
Whenever you buy/sell or close a position in the Tradingview strategy simply add the appropriate line of code:
alert(LongTicket, alert.freq_all)
or
alert(ShortTicket, alert.freq_all)
or
alert(CloseTicket, alert.freq_all)
Webhook URL for Alerts
The Tradingview alerts are, by default, empty. You will need to create a new one. Navigate and click on the small clock timer icon on right menu of your Tradingview screen.
Next up, click the small plus button to add a new alert, and go to the notification tabs.
You will need to check the Option: Webhook URL
Then add the following webhook url: https://webhook.pinetrader.io/
After that is done, in "Settings", make sure you select your trading strategy in the condition. And for the condition, select alert function calls only, this will make sure the order ticket is sent only once.
Give it a name, click "create" and that's about it!
You should see your new trading bot strategy in your alert panel (it might take a couple of seconds to show as "active").
NOTE: This requires a paid TradingView plan, looking to get 15$ off, check out our affiliate link: TradingView 1st month free.
Monitoring the trades
Using your Pinetrader.io account you can monitor the trades directly from your dashboard. You can leave your MT5 running and still check on your trades on your phone.

